How Many Ohms Should a Well Pump Have for Optimal Performance?
How many ohms should a well pump have for optimal performance? Understanding how many ohms a well pump should have is crucial for ensuring its operation.
Understanding how many ohms a well pump should have is crucial for ensuring its efficient operation. On some Franklin Electric models, the main winding may read about 3.0 to 3.6 ohms, while the start winding may read about 10.7 to 13.1 ohms. The correct winding resistance is always model-specific, so I check the pump’s data sheet before deciding whether a reading is normal.
As I’ve learned from working with various well pumps, keeping a close eye on these readings can save you time and money. A well-performing pump leads to consistent water supply, which is what everyone wants. If the readings are significantly lower or higher, it could indicate a malfunction that needs addressing.
In this article, I’ll take you through the basics of ohm readings for well pumps, how to troubleshoot when things go wrong, and the key maintenance tips that keep your system running smoothly. Understanding these can empower you to take control of your well pump’s health.
Key Takeaways
- Knowing the correct ohm readings can prevent costly repairs.
- Regular maintenance helps extend the life of your well pump.
- Troubleshooting begins with understanding the electrical components.
Understanding Well Pump Basics
When dealing with well pumps, I find it’s essential to grasp the different types and the significance of reading their resistance levels. A well pump serves a critical role in delivering water to our homes, so knowing its components can help us keep everything running smoothly.
Types of Well Pumps
I often come across two main types of well pumps: submersible pumps and jet pumps. Submersible pumps are typically found deep within the water. They push water up through a pipe and are great for deeper wells. Jet pumps, on the other hand, work above ground and create a vacuum to pull water from shallower wells.
Each type serves its purpose based on the well’s depth and location. For instance, if your well is over 25 feet deep, a submersible pump is usually the better choice. These pumps are efficient and often require less maintenance compared to jet pumps. Understanding these differences can help me select the right system for my needs.
Importance of Correct Ohms in Well Pumps
Knowing the correct ohms resistance for my well pump is crucial for its operation. The resistance affects how well the pump performs and can indicate if there’s a problem. If the ohms are too high or low, it might mean that there are issues like wire damage or a burned-out motor.
For instance, Franklin Electric’s well pumps often have a specified range of resistance. I make it a habit to refer to those specifications, as they help me troubleshoot effectively. Regular checks can prevent costly repairs down the line. Monitoring the resistance not only keeps my water supply steady but also extends the life of the pump.
Electrical Components of Well Pumps
To ensure your well pump operates smoothly, it’s crucial to know the main electrical components. Each part plays a vital role in the overall functionality of the pump system. Let’s break down these components to understand their significance better.
Role of the Control Box
The control box is essential for managing the power to the well pump. It contains various electrical components, including relays and fuses, that protect the pump from damage. When the system requires power, the control box sends the appropriate voltage to the pump.
I often find that understanding a well pump wiring diagram helps demystify this component. The control box will also have connections for the pressure switch and capacitor. When something goes wrong, this is usually the first place I check for issues.
Capacitor Function and Issues
Capacitors are crucial in starting and running your well pump. They store electrical energy and help the pump motor get up to speed. If the capacitor fails, you might notice the pump struggles to start or doesn’t start at all.
In my experience, checking for signs of a faulty capacitor is vital. Look for bulging or leaking components. It’s often an easy fix if you catch it early. Replacing a damaged capacitor can restore the pump’s performance and save you from more costly repairs down the line.
Understanding the Pressure Switch
The pressure switch plays a critical role in maintaining water supply in your home. It monitors the water pressure in the system and signals the pump to turn on when needed. This is essential for consistent water flow.
When the pressure drops below a set level, the switch activates the pump. Conversely, when the desired pressure is reached, it turns off the pump to prevent over-pressurization. If the pressure switch malfunctions, you might experience fluctuating water pressure or a pump that continuously runs. Keeping an eye on this can save you a lot of headaches later.
Ohm Readings and Electrical Measurements
Understanding ohm readings and how to measure them is crucial for ensuring your well pump operates efficiently. I’ll cover how to use an ohmmeter, interpret the readings you get, and explain the importance of continuity testing.
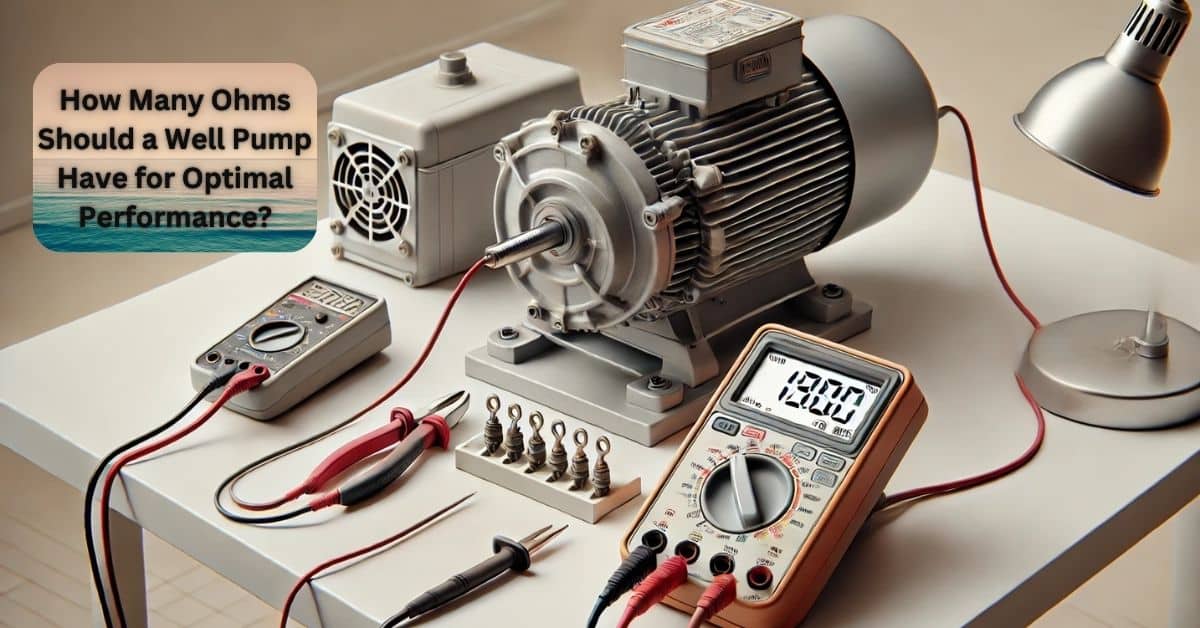
Using an Ohmmeter to Measure Resistance
To start measuring resistance, I use an ohmmeter. First, I make sure the power to the well pump is off. This is important for safety. Next, I connect one lead of the ohmmeter to the ground wire and the other to the pump’s power cable.
I adjust the meter to the appropriate ohm range. If I expect readings of less than 10 ohms, I choose a lower range. It’s essential to get a clear reading, so I watch for “OL,” which indicates open lead. This means the pump is powered correctly and should now be measured.
Interpreting Resistance Readings
When I get an ohm reading, I consider what it means for my pump. There is no single “good” winding-resistance range that fits every well pump motor. Some pumps read only a few ohms on one winding, while others read higher, so I always compare the reading against the manufacturer’s published spec for that exact model.
If the reading is significantly higher or lower than the spec for that motor, it can point to trouble in the windings or wiring. A reading that is too low can suggest shorted turns, while a reading that is too high or open can indicate a damaged or broken winding.
I often compare readings from the same pump. If I see fluctuations, that’s a red flag. Keeping track of these readings helps to establish a pattern, giving me a clearer picture of the pump’s health.
Significance of Continuity Test
Performing a continuity check with a multimeter can tell me whether the circuit path is intact. I treat that as a separate test from an insulation-resistance test with a megger.
When I test for continuity, I’m looking for a complete path for the electrical current. To do this, I set my multimeter to continuity or low-ohms mode and check the expected terminals. A low, stable reading that matches the motor’s spec indicates the winding is connected as expected.
If there’s no continuity, I see it as a potential problem area. Addressing these issues early can save time and repair costs down the road. By being proactive with these tests, I ensure reliable operation and longevity for my well pump.
Troubleshooting and Diagnostics
When it comes to well pumps, understanding ohms readings is crucial for diagnosing issues. Identifying common problems and handling breaker trips or ground faults ensures your system runs efficiently and safely.
Identifying Common Problems with Ohms Readings
First, I check the winding resistance of the well pump using a multimeter. Different pump models have specific resistance values based on manufacturer specifications. On some Franklin Electric motors, for example, the main winding may be about 3.0 to 3.6 ohms and the start winding about 10.7 to 13.1 ohms, but the exact numbers depend on the motor. If your reading is too low or significantly higher than the published spec for your model, it indicates a problem such as shorted coils or an open winding.
Separately, I also perform an insulation resistance test using a megger. This test measures the resistance between the windings and ground. Per IEEE Standard 43, insulation resistance must exceed 1 megaohm (1,000,000 ohms). If the reading is below 1 MΩ—such as 500,000 ohms—the insulation is degraded and the motor is failing. A reading of 10–100 MΩ or higher indicates healthy insulation. These two tests (winding and insulation) are separate and must not be confused.
Safety warning: Never confuse a winding-resistance test on a multimeter with an insulation-resistance test on a megger. Winding resistance is usually measured in single-digit or double-digit ohms and must match the motor’s data sheet. Insulation resistance is measured in megaohms to ground, and 500,000 ohms on a megger means failing insulation, not a healthy motor.
Dealing with Breaker Trips and Ground Faults
Breaker trips can indicate serious problems in the system. When the pump draws too much current, the breaker will trip to protect the circuit. I first inspect the pressure tank and wiring to identify any visible wear or loose connections that might cause overloads.
A ground fault may also trip breakers. I check for moisture or damaged insulation in the wires. This can lead to dangerous situations if not addressed. Using a multimeter, I test for proper voltage and resistance across various components. Keeping track of these readings helps me stay ahead of potential failures.
Practical Guide to Well Pump Maintenance
Well pump maintenance is vital to ensure optimal performance and longevity. Proper routine checks can save you from costly repairs. Whether it’s a submersible pump or a Goulds pump, knowing how and when to pull the pump is essential.
Routine Checks and Maintenance Timing
Regular inspections can prevent issues down the line. Start by checking the electrical connections for any signs of wear or corrosion. Ensure the circuit breaker is functioning properly.
Next, listen for any unusual noises when the pump is running. If you hear strange sounds, it might be time to investigate further.
Monthly checks should include inspecting the pressure tank and looking for leaks. Each year, it’s wise to have a professional service your pump for a thorough assessment.
Pay attention to changes in water quality or pressure, as these could indicate problems with your pump. Getting ahead of issues can save time and money.
Step-by-Step Guide to ‘Pull the Pump’
Pulling the pump may sound daunting, but it’s a manageable task with the right approach.
Start by shutting off the power to your pump at the breaker. This is crucial for safety. Next, connect a hoist or use a pulley system attached to the well cap.
Remove the cap and carefully lift the pump out, ensuring you don’t snag any wires. If it’s a submersible pump, you might need a few extra hands to keep it steady.
Inspect the pump thoroughly for any wear and damage. Check components like the bearings, impeller, and wiring.
If everything looks good, you can clean it before reinstallation. Be sure to reinstall it securely to avoid future problems. Regularly pulling the pump will help maintain its efficiency and performance.
Electrical Safety Precautions
When working with a well pump, I cannot stress enough the importance of electrical safety. Taking precautions can prevent accidents and ensure a smooth operation. Here are crucial measures to keep in mind.
Handling Hot Wires and Voltage Concerns
First, I always disconnect power to the well pump before handling any wires. This is a must to avoid electrical shock. I check that the circuit is off with a multimeter, making sure there’s no live voltage.
When working with hot wires, I keep a steady hand and use insulated tools. This helps protect me from potential hazards. It’s also vital to avoid touching grounded surfaces while managing hot wires.
Learn the voltage rating of your well pump and ensure that my equipment matches it. If I notice any exposed wires or damaged insulation, I fix them immediately. Ignoring these issues can lead to bigger problems down the road.
Circuit Breakers and Safe Pump Operation
Circuit breakers are my first line of defense. They automatically cut off power if something goes wrong, like an overload or short circuit. I ensure to regularly inspect the circuit breaker associated with my well pump.
I keep the correct amperage rating for my pump’s circuit. Using a breaker with an improper rating can either trip too easily or fail to protect my equipment when needed.
Before starting the well pump, I conduct a quick check. Ensuring that the breaker is on, and nothing seems out of place is just good practice. If a breaker trips, it usually signals a problem that I must address before resetting it. Always stay aware; safety is key!
Frequently Asked Questions
I often hear questions about well pump resistance and how to ensure everything is running smoothly. Understanding how to measure and interpret resistance can help avoid costly repairs and keep your water supply reliable.
What’s the typical resistance range for a submersible well pump?
For a submersible well pump, there is no universal resistance range that applies to every model. The correct winding resistance depends on the pump’s specifications and brand, so I always compare my meter reading to the manufacturer’s data sheet before calling it good or bad.
How do you measure a well pump’s resistance using a multimeter?
To measure resistance, you’ll want to start by disconnecting the power to the pump for safety. Set your multimeter to the ohms setting and touch the probes to the motor terminals. A stable reading will help you determine the resistance of the pump.
How can I check my well pump’s functionality without the hassle of pulling it out?
You can perform a voltage test at the control box to check if the pump is receiving power. You can also listen for unusual noises or vibrations while the pump is running. Both methods can provide insights without pulling the pump out of the well.
What resistance readings indicate a healthy 1 HP submersible pump?
For a 1 HP submersible pump, the healthy winding resistance still depends on the exact motor design. I use the manufacturer’s resistance chart for that specific pump and compare each winding reading to the published values rather than relying on a one-size-fits-all range.
Can you walk me through testing a well pump control box?
Sure! Start by ensuring the power is off. Then, remove the cover of the control box and check the wiring for any visible damage. After that, test the terminal connections for voltage. If everything looks good, you should also check the relays for continuity with a multimeter.
What’s the general rule for motor resistance in working condition?
A motor in working condition should match the manufacturer’s specified winding resistance for that exact model. Readings that are well below spec can indicate shorted windings, while readings far above spec or open can indicate a damaged winding. For insulation resistance to ground, IEEE Std 43 calls for more than 1 MΩ, and anything below that threshold needs attention.

Thomas Peterson
Owner WSA
About the Author
Latest Posts
Born and raised in Nanaimo on Vancouver Island. Thomas gained a deep appreciation for the importance of clean, reliable water. With over 15 years of experience working with water treatment systems, Thomas has become a trusted expert in helping local homeowners and businesses resolve the unique challenges of well water across the Island.
From hard water and iron buildup to low water pressure and sediment issues, Thomas takes a practical, no-nonsense approach to solving water problems. Whether it’s installing filtration systems or troubleshooting well pump issues, Thomas focuses on long-lasting solutions that help people get the clean, safe water they need.
As a proud local professional, Thomas is dedicated to serving his community with honesty, quality service, and expert advice tailored to the water conditions of Vancouver Island.
Areas of Expertise: Well Service, Well Pumps, Water Filtration Systems
- Clack Water Softener Alternatives: Top Systems for Hard Water Treatment in 2025 November 8, 2025
- Best Well Water Test Kit Options for Safe Home Water Testing in 2025 November 5, 2025
- Best Well Water TDS Meter for Accurate Home Testing in 2025 November 1, 2025
- Best Well Water Sediment Filter Systems for Clean Home Water in 2025 October 29, 2025
- Best Well Water Saltless Water Softener Systems for 2025 October 26, 2025
Facebook Twitter LinkedIn Instagram Reddit
Fact Checked & Editorial Guidelines
Our Fact Checking Process
We prioritize accuracy and integrity in our content. Here’s how we maintain high standards:
- Expert Review: All articles are reviewed by subject matter experts.
- Source Validation: Information is backed by credible, up-to-date sources.
- Transparency: We clearly cite references and disclose potential conflicts.
Your trust is important. Learn more about our fact checking process and editorial policy.
Reviewed by: Subject Matter Experts
Our Review Board
Our content is carefully reviewed by experienced professionals to ensure accuracy and relevance.
- Qualified Experts: Each article is assessed by specialists with field-specific knowledge.
- Up-to-date Insights: We incorporate the latest research, trends, and standards.
- Commitment to Quality: Reviewers ensure clarity, correctness, and completeness.
Look for the expert-reviewed label to read content you can trust.