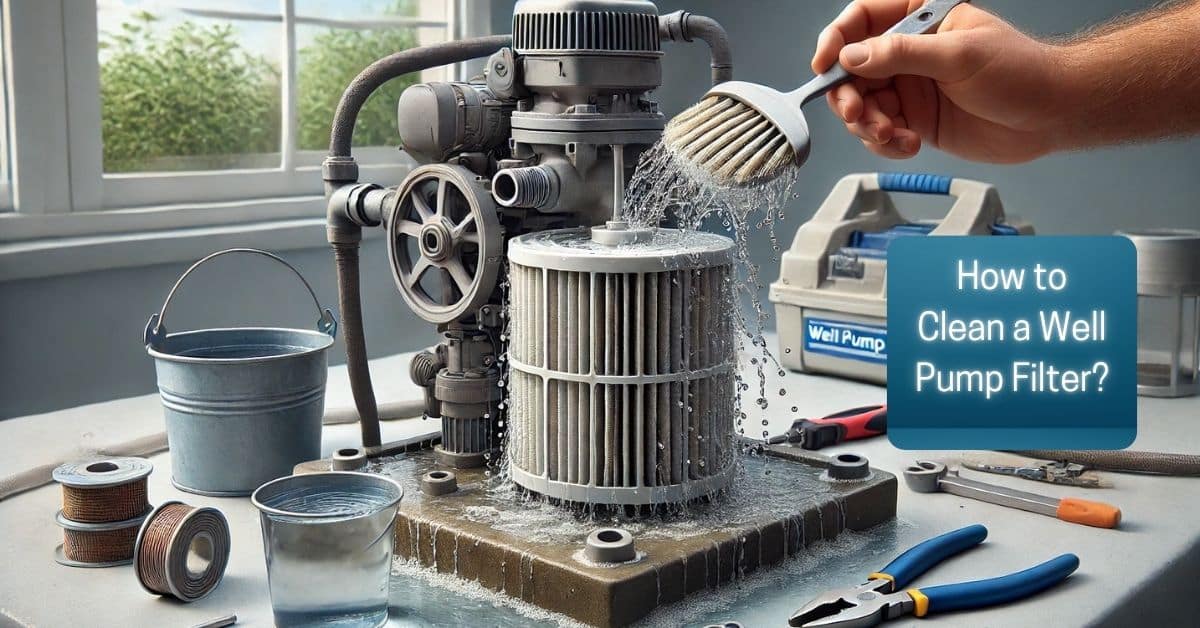
How to Clean a Well Pump Filter? Step-by-Step Guide
How to clean a well pump filter? Cleaning a well pump filter is crucial for maintaining the quality of your water and ensuring your pump operates effectively.
Cleaning a well pump filter is crucial for maintaining the quality of your water and ensuring your pump operates effectively. Regularly cleaning your filter can prevent sediment buildup that may cause your pump to work harder and extend its lifespan. Whether you’ve noticed a decrease in water pressure or just want to ensure your well system is in tip-top shape, I’ve got the guidance you need.
In this post, I’ll walk you through the entire cleaning process in a straightforward manner. I know it can be daunting if you’re not familiar with your well system, but with a little preparation and the right steps, you’ll have your well pump filter cleaned quickly and properly. I’ll also share some tips on maintaining both water quality and your pump’s efficiency after the cleaning.
Cleaning your well pump filter doesn’t have to be complicated. With the right techniques, you can ensure your water remains clean and safe, keeping your home running smoothly. Let’s get started!
Understanding Your Well Pump System
When it comes to keeping your well pump system running smoothly, knowing its components and recognizing signs of a clogged filter are essential. These details can help you avoid costly repairs and ensure a safe water supply.
Components of a Well Pump System
A well pump system comprises several key parts that work together. The main components include:
- Well Pump: This is the heart of the system, drawing water from the well and pumping it into your home.
- Pressure Tank: This tank stores water and helps maintain consistent pressure throughout the plumbing system. It reduces the need for the pump to turn on and off frequently.
- Filter: This device removes sediments and impurities from the water. Keeping it clean is vital for ensuring good water quality.
- Pressure Switch: This component monitors the pressure in the tank and signals the pump to start or stop based on demand.
Understanding these parts can help you identify issues and perform effective maintenance as needed.
Signs of a Clogged Filter
Recognizing a clogged filter early can save time and headaches. Here are common signs to watch for:
- Low Water Pressure: If you notice that water flow is weaker than usual, it might indicate a clogged filter. The pressure tank may be unable to maintain consistent pressure.
- Sediment in Water: If your water looks murky or has visible particles, this may mean the filter isn’t doing its job properly.
- Strange Noises: Unusual sounds from the well pump can signal a problem. A clogged filter causes the pump to work harder, leading to abnormal sounds.
Being aware of these signs allows you to take action quickly and ensure your well pump system continues to function effectively.
Preparation for Cleaning the Well Pump Filter
Before diving into the cleaning process, it’s crucial to lay the groundwork for a safe and effective job. Proper preparation will save you time and effort while ensuring your well pump runs smoothly.
Safety First
Safety is my top priority, so I always gear up before starting any work. Make sure to wear gloves and safety goggles to protect yourself from dirt and debris. It’s wise to have a first aid kit nearby in case of any minor accidents.
Ensure that the area around your well pump is clear of obstructions. A clean workspace minimizes the risk of tripping or falling. If you’re dealing with a lot of sediment, be prepared to encounter mud. I find it helpful to wear rubber boots to keep my feet dry.
Tools and Materials
Having the right tools makes cleaning much easier. Here’s what I typically gather:
- Bucket: For catching water and sediment.
- Screwdriver: To open the filter housing.
- Soft brush: To gently remove grime from the filter.
- Clean water: For rinsing the filter after cleaning.
- Towels: To dry off the equipment.
I always double-check to ensure I have everything before starting. This saves me from making multiple trips back to the shed, which can disrupt my rhythm. Being organized helps me work efficiently.
Turn Off Power and Pressure
Before I touch anything on the well pump, I make sure to turn off the power. I locate the main switch for the pump and shut it off. This step is crucial for my safety.
Next, I relieve any pressure in the system. To do this, I open a tap connected to the well for a few moments. This step reduces the risk of water spraying unexpectedly when I remove the filter.
With the power off and the pressure relieved, I can proceed confidently to clean the well pump filter. Taking these precautions allows me to focus on the task without worrying about safety hazards.
Step-by-Step Guide to Cleaning the Well Pump Filter
Cleaning the well pump filter is essential for maintaining water quality and flow. The process involves several key steps to ensure the filter is free from contaminants and functioning correctly. Let’s dive into each step.
Removing the Filter
First, I need to ensure my safety by turning off the power to the well pump. This is crucial to avoid any electrical hazards.
Next, I’ll locate the filter, which is often found in the well casing. Using a wrench, I carefully loosen the bolts that secure it in place. After that, I gently pull the filter out and place it in a clean bucket to catch any remaining water.
Handling the filter with care is essential, as I don’t want to introduce new contaminants during this process.
Inspecting the Filter
Once the filter is out, I take a close look at it for any signs of damage or excessive buildup. A clogged filter can reduce water flow and pump efficiency.
I check for dirt, debris, or rust. If the filter looks damaged, I know it may need to be replaced. For minor wear, cleaning will suffice.
At this point, it’s important to determine how often I’ve cleaned the filter in the past. Setting a regular cleaning schedule can prevent larger issues down the line.
Manual Cleaning Process
To manually clean the filter, I start by rinsing it with water to remove loose contaminants. I use a garden hose for this, aiming to dislodge any stuck debris.
Then, I prepare a vinegar solution by mixing equal parts of white vinegar and water. This solution helps break down mineral buildup and tough stains. I soak the filter in the vinegar solution for about 30 minutes.
After soaking, I scrub the filter gently with a soft brush. This ensures I reach all the nooks and crannies. Once clean, I rinse it thoroughly to remove any remaining vinegar and loosened debris.
Using Cleaning Solutions
For tougher buildup, it may be necessary to use specialized cleaning solutions. Many stores offer products designed specifically for cleaning well pumps and filters.
Before using any cleaning solution, I carefully read the label for proper instructions and safety information.
I apply the solution as directed, allowing it to sit for the recommended time. This can help eliminate any stubborn contaminants. Afterward, I rinse the filter again to ensure no chemical residue remains.
Flushing the System
After cleaning the filter, flushing the entire well pump system is important. I turn the water pressure back on, which helps remove any remaining debris from the lines.
To do this, I run water through the system for several minutes. I monitor the water flow to ensure that it’s steady and free from sediment.
This step helps clear out contaminants that may have settled during the cleaning process. It also boosts the efficiency of the pump by ensuring there are no blockages in the lines.
Reassembling and Testing
Once everything is clean and flushed, I’m ready to reassemble the filter. I carefully place the filter back into its original position, making sure it fits snugly. I then use the wrench to tighten the bolts, ensuring it’s secure.
After reassembling, I turn the power back on and check for leaks. It’s important to monitor the flow rate to ensure everything is working as expected. If the water flow is strong and clean, I know my cleaning efforts were successful.
Taking the time to properly clean and maintain the well pump filter keeps my water supply safe and efficient.
Post-Cleaning: Maintaining Water Pressure and Quality
After I clean my well pump filter, it’s vital to focus on maintaining the water pressure and ensuring the quality of my water. These steps help keep my system running smoothly and provide clean water for my household.
Checking Water Pressure
I always start by checking the water pressure. First, I turn on a tap and use a pressure gauge to measure the flow. Ideally, I want the pressure to be between 40 and 60 psi. If it’s lower, it could mean a blockage or an issue with the pump.
To troubleshoot, I examine the well water filter and other components for clogs or damage. I also listen for unusual noises from the pump, which can signal problems. If pressure issues persist, I may need to contact a professional. Keeping the water pressure steady ensures my home has the flow I need for daily use.
Ensuring Water Quality
Next, I focus on ensuring my water quality. After cleaning the well pump filter, I test for contaminants like bacteria, nitrates, and heavy metals. I often purchase a home testing kit to check levels myself, but sometimes it’s best to send a sample to an accredited lab.
If I notice any concerning results, I take immediate action, which might include additional filtration or shock chlorination. Maintaining high water quality is crucial for health, so I never skip this step. Clear, clean water means peace of mind for me and my family.
Scheduling Regular Maintenance Tasks
Regular maintenance tasks keep my well system in top shape. I set a schedule for checking the water filter and pump at least twice a year. During these checks, I clean the filter thoroughly to avoid sediment build-up.
I also inspect the entire system for any wear and tear, including piping and connections. Proper maintenance helps prevent bigger issues down the road. Regularly maintaining my well ensures that I have reliable water pressure and quality for all my needs.
Troubleshooting Common Well Pump Filter Issues
When it comes to keeping your well pump filter in top shape, I’ve run into a few common issues that can really slow things down. Knowing how to troubleshoot these problems is key to ensuring clean, strong water flow. Here’s what I’ve learned.
Low Water Pressure Problems
Low water pressure can be frustrating. If I’m suddenly getting weak flow, the filter might be partially clogged. First, I check the pressure gauge on the pump. If it’s reading lower than usual, it’s time to inspect the filter.
To fix this, I turn off the pump and give the filter a thorough clean. Removing any accumulated debris and sediment can make a big difference. I also check for leaks in the system. Sometimes, a leak can reduce pressure as well. Regular maintenance, like cleaning the filter, helps prevent this issue from cropping up too often.
Addressing Contaminant Build-up
Contaminant build-up in the filter is another common issue. If I notice strange tastes or smells in the water, I know something’s off. It’s crucial to identify the contaminants. Sediments, rust, and even bacteria can creep into the well.
To tackle this, I recommend installing a sediment trap or a whole-house filter system. When doing maintenance, I flush the filter and replace any worn-out parts. This reduces the chances of harmful contaminants affecting my water supply. Keeping an eye on water quality tests is also a smart move.
Dealing with Persistent Filter Clogs
Persistent clogs can be a real headache. If my filter seems to clog repeatedly, there are a few things I check. First, I look for signs of excessive mineral deposits. Hard water can lead to scale build-up that restricts flow.
In cases like these, I often try using a descaler to help break down the minerals. Regular cleaning is vital, so I set a schedule to avoid major blockages. I also ensure I’m using the right filter for my water quality. Finding the proper filtration solution can minimize these clogs.
Taking the time to address these issues not only keeps my water flowing smoothly but gives me peace of mind knowing my well system is in good shape.
Best Practices for Well Pump Longevity
Taking care of your well pump is essential for its efficiency and lifespan. Regular maintenance, proper handling, and knowing when to call for help can make a huge difference. Here’s what I’ve learned about keeping your well pump in top shape.
Regular Cleaning Intervals
I can’t stress enough the importance of cleaning your well pump filter regularly. Dirt and debris build up over time, which can lead to clogging. It’s best to check and clean the filter every three to six months, depending on how much water you use.
To clean, turn off the power and remove the filter. Rinse it thoroughly with water and a brush if needed. I always keep a checklist for maintenance tasks, so I don’t miss these cleanings. Keeping this routine prevents future problems and maintains water quality.
Proper Handling and Storage
How you handle and store your well pump can directly affect its longevity. When you’re working on it, always follow safe practices. Wear gloves and goggles for protection. If you’re storing the pump, make sure it’s in a dry, dust-free area.
I also recommend disconnecting all power sources before any maintenance. If you’re winterizing it, drain any water inside to avoid freezing and cracking. This kind of attention prevents unnecessary damage and helps maintain functionality.
When to Seek Professional Assistance
Sometimes, no matter how diligent I am, I realize I need a professional’s eyes on the situation. If you notice strange noises, decreased water pressure, or continual pump cycling, it’s time to call for help.
I learned that ignoring these signs could lead to serious issues. A professional can conduct a thorough inspection and tackle any maintenance tasks I might overlook. Investing in expert help can save you time and money in the long run.
Frequently Asked Questions
Cleaning a well pump filter can raise quite a few questions. It’s important to get specifics right to maintain your water system’s quality and performance. Let’s tackle some common queries.
What’s the best way to clear out a sediment filter for a household well?
To clear out a sediment filter, I recommend turning off the power to the well pump first. Once it’s safe, remove the filter from its housing. Rinse it under clean water to remove the bulk of the sediment. If it’s heavily clogged, soaking in a vinegar solution can help dissolve buildup. After cleaning, flush the filter with clean water again before re-installing.
Can I safely clean a well pump filter with vinegar, or is there a better method?
I find that vinegar can be quite effective for cleaning well pump filters. It’s a natural descaler that helps break down mineral deposits. However, if your filter is damaged or heavily soiled, a stronger commercial cleaner might be necessary. Be sure to follow the instructions on any cleaning product to avoid damage.
After locating my well pump filter, how should I go about giving it a good scrub down?
Start by shutting off the power to your pump. Next, carefully remove the filter from its housing. Using a soft-bristled brush, scrub off any debris or sediment. For tougher spots, soaking the filter in a vinegar solution can help. Rinse well with clean water to ensure no cleaning solution remains.
Is it an option to just wash and reuse any water filters, specifically those for a well pump system?
Some water filters can be washed and reused, while others are designed for single use. If you have a washable filter, ensure it’s thoroughly cleaned before reinstallation. Check with the manufacturer’s guidelines to know if reusing your filter is safe. Always prioritize your water quality when making these decisions.
What steps are involved in cleaning a multi-stage water filter system without damaging it?
Cleaning a multi-stage water filter system requires careful attention. Start by turning off the water supply. Remove each stage of the filter and clean them according to the manufacturer’s instructions. Rinse all components thoroughly with clean water. Reassemble the system and perform a test run to ensure everything is functioning well.
Got a pleated water filter cartridge in your well system? Here’s how to keep it performing like a champ.
To maintain a pleated water filter cartridge, I suggest regular cleaning every few months. Remove the cartridge and rinse it under running water to dislodge debris. Avoid using soaps or harsh chemicals. Keep an eye on the water flow rate; if it drops significantly, it might be time for a replacement to ensure clear water flow.

Thomas Peterson
Owner WSA
About the Author
Latest Posts
Born and raised in Nanaimo on Vancouver Island. Thomas gained a deep appreciation for the importance of clean, reliable water. With over 15 years of experience working with water treatment systems, Thomas has become a trusted expert in helping local homeowners and businesses resolve the unique challenges of well water across the Island.
From hard water and iron buildup to low water pressure and sediment issues, Thomas takes a practical, no-nonsense approach to solving water problems. Whether it’s installing filtration systems or troubleshooting well pump issues, Thomas focuses on long-lasting solutions that help people get the clean, safe water they need.
As a proud local professional, Thomas is dedicated to serving his community with honesty, quality service, and expert advice tailored to the water conditions of Vancouver Island.
Areas of Expertise: Well Service, Well Pumps, Water Filtration Systems
- Clack Water Softener Alternatives: Top Systems for Hard Water Treatment in 2025 November 8, 2025
- Best Well Water Test Kit Options for Safe Home Water Testing in 2025 November 5, 2025
- Best Well Water TDS Meter for Accurate Home Testing in 2025 November 1, 2025
- Best Well Water Sediment Filter Systems for Clean Home Water in 2025 October 29, 2025
- Best Well Water Saltless Water Softener Systems for 2025 October 26, 2025
Facebook Twitter LinkedIn Instagram Reddit
Fact Checked & Editorial Guidelines
Our Fact Checking Process
We prioritize accuracy and integrity in our content. Here’s how we maintain high standards:
- Expert Review: All articles are reviewed by subject matter experts.
- Source Validation: Information is backed by credible, up-to-date sources.
- Transparency: We clearly cite references and disclose potential conflicts.
Your trust is important. Learn more about our fact checking process and editorial policy.
Reviewed by: Subject Matter Experts
Our Review Board
Our content is carefully reviewed by experienced professionals to ensure accuracy and relevance.
- Qualified Experts: Each article is assessed by specialists with field-specific knowledge.
- Up-to-date Insights: We incorporate the latest research, trends, and standards.
- Commitment to Quality: Reviewers ensure clarity, correctness, and completeness.
Look for the expert-reviewed label to read content you can trust.