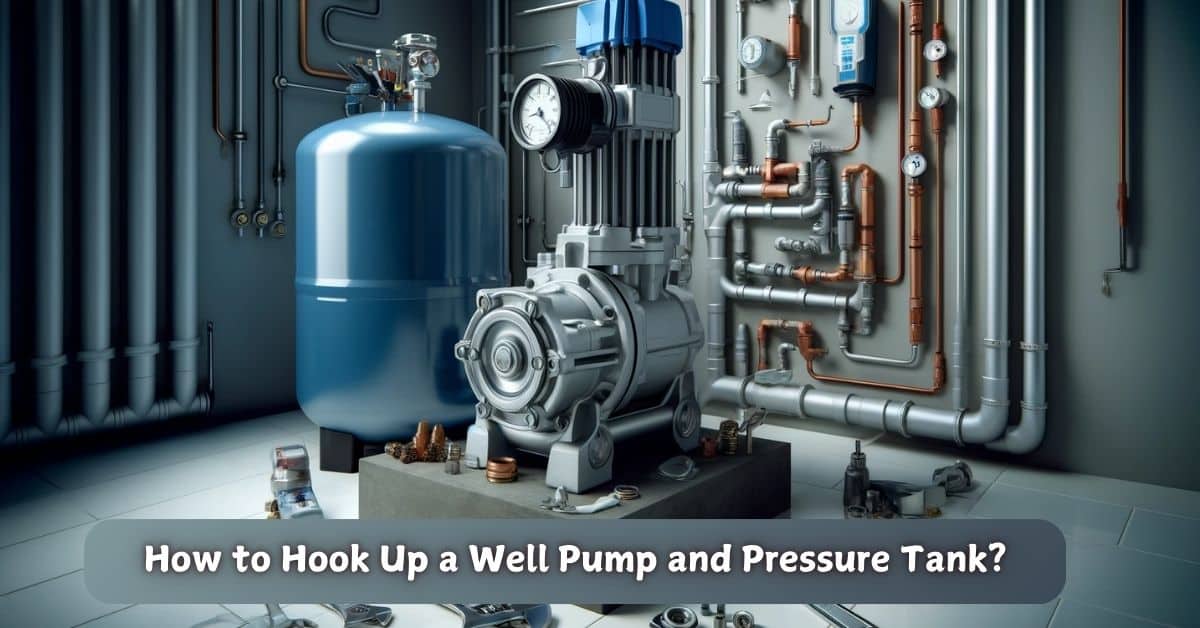
How to Hook Up a Well Pump and Pressure Tank? (Best Guide)
How to hook up a well pump and pressure tank? Setting up a well pump and pressure tank may seem daunting, but with the right guidance, you can do it yourself.
Setting up a well pump and pressure tank may seem daunting, but with the right guidance, you can do it yourself. Understanding how to properly hook up a well pump and pressure tank ensures a reliable water supply and efficient system performance in your home. I’ve been through the process myself and can share valuable tips that make the installation easier than you’d think.
In this blog post, I’ll walk you through everything from planning your installation to understanding the components of your well water system. I remember the first time I tackled this job; it was a learning experience that equipped me with practical knowledge. You’ll find that knowing how to secure your water supply and where to position your tank can make all the difference in ensuring a successful setup.
By the end, you’ll have a clear, step-by-step approach to getting your well pump and pressure tank running smoothly. Whether you’re a seasoned DIYer or a homeowner looking to learn, I’m here to share insights that can save you time and effort.
Key Takeaways
- Planning is crucial for a smooth installation.
- Knowing your system helps ensure reliability.
- Regular maintenance keeps your well water flowing.
Understanding Your Well Water System
To effectively hook up a well pump and pressure tank, it’s crucial to grasp how your well water system operates. This means knowing the essential components and determining how much water your household needs.
Components of a Typical Well Water System
A standard well water system includes several key parts. First, there’s the submersible well pump, which sits deep in the well and draws water up. This pump is critical for ensuring a steady flow of water.
Next is the pressure tank. This tank stores water and maintains consistent water pressure. Inside, it has a diaphragm that separates water from air. When you turn on a faucet, the air pressure pushes water out until it drops to a certain level. Then, the pressure switch signals the pump to turn on and refill the tank.
Other important parts include pipes, a pressure switch, and a pressure gauge. Each component plays a role in making sure you have reliable access to well water.
Determining Your Water Supply Needs
Knowing your household’s water supply needs is essential. Think about how many people live in your home and how much water they use daily.
A typical household might need around 50 to 100 liters of water per person each day. This includes drinking, cooking, cleaning, and other daily chores. For larger families, you may need to increase the tank size and pump capacity to meet your needs.
You should also consider peak usage times, like mornings when everyone is getting ready. Assessing your water needs ensures your well system can provide enough water without straining the pump or tank, keeping everything running smoothly.
Planning Your Installation
Planning your installation is crucial for achieving optimal performance from your well pump and pressure tank system. It involves careful selection of equipment, proper sizing, gathering the right tools, and understanding safety protocols.
Choosing the Right Pump and Pressure Tank
When selecting a well pump, I consider the type that fits my well conditions. I often choose a submersible pump if the well is deep. These pumps work efficiently underwater, pushing water to the surface.
The pressure tank also matters. I typically opt for bladder tanks or diaphragm tanks. Bladder tanks are popular for their durability and ability to maintain consistent pressure.
I always check manufacturer specifications to ensure compatibility between my chosen pump and tank. I want to avoid common pitfalls like mismatched capacities, which can lead to frequent malfunctions or even failures.
Pressure Tank Sizing and Selection
Choosing the right pressure tank size is essential. It affects water delivery to my home and how often the pump has to turn on and off.
As a rule, I look for a tank that can hold enough water to meet my household needs without excessive energy consumption. For an average family, a tank with a capacity of 20 to 44 gallons is usually sufficient.
I also pay attention to pressure settings. Knowing the cut-in pressure (when the pump starts) and cut-out pressure (when it stops) helps prevent damage to the system. Most residential systems use a cut-in pressure of 30 PSI and a cut-out pressure of about 50 PSI, ensuring balance between water supply and pump longevity.
Tools and Materials Required
Gathering the right tools and materials is a must. Here’s a quick list of what I often need:
- Teflon tape: For sealing connections
- Wrenches: To tighten fittings
- PVC pipes: For plumbing connections
- Pressure gauge: To monitor system performance
- Wire connectors and electrical tape: For safe electrical work
Having everything ready speeds up the installation and reduces the chance of mistakes. I take my time to double-check connections and settings to ensure everything runs smoothly.
Safety Considerations for Electrical Work
Safety is a big deal when I’m working with electricity. First, I always turn off the power at the circuit breaker before starting any electrical work.
Using proper wire connectors and electrical tape helps prevent shorts and ensures secure connections. I also make sure that my pump’s electrical components are rated for outdoor use if required.
Lastly, I consult local codes for any additional safety requirements. It’s important to follow these to keep my home safe and compliant.
Installation Process
When hooking up a well pump and pressure tank, it’s crucial to follow a careful installation process. This ensures that your water supply works efficiently and reliably. I’ll cover the essential steps that make this process straightforward and manageable.
Installing the Submersible Well Pump
First, I need to lower the submersible well pump into the well casing. I ensure that the pump is properly secured with a safety rope or harness. I then attach a check valve to prevent backflow, which is vital for maintaining pressure.
Next, I connect the pipe fittings securely. I make sure that I use thread tape to seal the joints, minimizing leaks. Once everything is attached, I lower the pump into the well.
Before I plug it in, I double-check the depth of the pump to ensure it’s submerged adequately without being too deep, where it could draw in debris.
Connecting the Pressure Tank
With the pump in place, it’s time to connect the pressure tank. I first position the tank on a stable base, ensuring it’s level. Next, I attach the inlet pipe from the well pump to the tank’s inlet.
One important detail is to confirm that the pipe is securely fastened, using appropriate valves where necessary. This allows for easy maintenance later on.
I also check the pressure tank’s air pressure using a gauge. The typical cut-out pressure should be around 30-50 PSI for most residential systems. If it’s lower, I add air until it reaches the desired level.
Wiring and Electrical Connections
Now, I tackle the wiring. I begin by turning off the power at the circuit breaker to avoid any electrical shock.
I then follow the manufacturer’s wiring diagram to connect the pump to the electrical supply. It’s essential to match wires according to their colour codes.
Additionally, I ensure that the entire system is properly grounded. A good ground helps prevent electrical hazards and potential damage to the equipment.
Once the connections are secure, I cover the electrical junction box with a weatherproof cover for added safety and protection from moisture.
Setting Up the Pressure Switch
I now focus on installing the pressure switch. This small device is crucial for controlling the pump’s operation based on water demand. I mount the switch on a stable surface close to the pressure tank and connect it to the tank outlet.
The connections must be tight. This device should be set according to the specific cut-in and cut-out pressures, usually around 30-50 PSI, as mentioned.
Once connected, I test the system. I turn the power back on and check for any leaks. Then, I monitor the system to see if the pressure switch activates as expected when running water.
Securing Your Water Supply
It’s crucial to ensure that your well pump and pressure tank system operates efficiently. Regular testing and adjustments help prevent leaks and maintain optimal pressure settings. I’ll cover how to check for leaks, make final adjustments, and ensure consistent water pressure.
Testing for Leaks and Pressure Fluctuations
I start by visually inspecting the entire system for any signs of leaks. Look for puddles around the tank and pipes. A leak can not only waste water but also affect your pressure settings.
Next, I monitor the pressure gauge. If I notice fluctuations, I check the check valve and connections. Sometimes, a loose fitting can cause significant pressure drops. Identifying and sealing leaks promptly prevents further damage and maintains water efficiency.
Final Adjustments to Pressure Settings
Once I confirm there are no leaks, I adjust the pressure settings. The common settings are 30/50 or 40/60 PSI. This means the pump will turn on at 30 (or 40) PSI and off at 50 (or 60) PSI.
I consult the manufacturer’s instructions for the best pressure settings for your specific tank. After setting the pressure switch, I test the system. I watch the gauge to see if it ticks consistently between the set levels. If it doesn’t, I might need to tweak the settings again.
Ensuring Consistent Water Pressure
To ensure consistent water pressure, I check my water usage patterns. High demand, like multiple faucets running simultaneously, can strain the system.
I might consider installing a larger pressure tank if the pressure dips too low during peak usage. This provides a buffer and stabilizes flow.
Routine maintenance is key. I routinely check the pump and tank for performance issues. Proper upkeep means I won’t deal with troublesome pressure drops or decreased water flow. Regular checks help secure my water supply for the long run.
Maintenance and Troubleshooting
Maintaining your well pump and pressure tank is essential to keep everything running smoothly. Regular check-ups will help you identify any issues early and save you money down the road. Below, I’ll share specific tips on maintenance and how to tackle common problems.
Routine Maintenance Tips
I recommend checking the pressure in your pressure tank at least once a year. Use a pressure gauge to ensure it falls within the accepted range, typically a difference of 20 PSI between cut-in and cut-off values. Proper settings ensure the pump operates efficiently.
Next, inspect the pump and tank for any signs of leaks. Look around the valves and connections. If you notice water or dampness, it could indicate damage that needs repair.
It’s also wise to clean the intake screen and flush the system to avoid mineral buildup. Keeping the area around the pump clear of debris will prevent any interference.
Common Issues and How to Fix Them
If your water pressure is inconsistent, the pressure switch might not be functioning correctly. It’s the component that senses pressure levels and turns the pump on or off. If your switch is faulty, it could lead to costly well pump replacement costs.
Another common issue is a leaking pressure tank. If you see water pooling around it, the tank may need a replacement. Make sure to also check all valves for leaks. Tightening or replacing worn-out valves can often solve this issue.
Should the pump run continuously without stopping, it could mean there’s a problem in the system that requires troubleshooting. Sometimes, adjusting the pressure settings can resolve this.
When to Call a Professional
I often tell homeowners to trust their instincts. If things seem off and you can’t pinpoint the problem, it might be time to call a professional.
For instance, if you’ve tried to adjust the pressure settings but still have issues, an expert can diagnose deeper problems in the system. They have specialized tools and expertise to deal with complex situations.
If repairs are extensive or if the well pump itself needs to be replaced, you will want a professional to ensure everything is set up correctly. This protects your investment and gives you peace of mind.
Choosing a Tank Location and Installation Tips
When it comes to hooking up a well pump and pressure tank, the success of the system largely hinges on choosing the right tank location and following key installation tips. I’ll guide you through selecting an ideal spot and provide specific steps for a proper installation.
Selecting the Ideal Location for the Tank
Choosing the perfect spot for your pressure tank can make all the difference. Aim for a dry, level area close to the well and pump. This reduces the amount of plumbing work and keeps the setup efficient.
Consider accessibility for maintenance. A location that’s easy to reach will make future repairs simpler, saving you time and effort. Avoid placing the tank in areas prone to flooding or extreme temperatures.
I also recommend using Teflon tape on all threaded connections to prevent leaks. Whether you’re tackling this DIY or opting to hire a pro, you’ll want to ensure the location meets local codes and regulations.
Step-by-Step Guide to Installing a Pressure Tank
Installing a pressure tank requires some precise steps. First, make sure you have the right tools: pipe wrenches, Teflon tape, and appropriate fittings.
- Prepare the Area: Clear and level the ground where the tank will sit. This helps to provide a stable base.
- Connect the Plumbing: Attach the tank to the well pump, ensuring all fittings are tight. Use Teflon tape on threaded joints for a secure seal.
- Position the Pressure Switch: Install the pressure switch in a location where it can effectively gauge water pressure.
- Check for Leaks: Once everything is connected, turn on the system and check for any leaks. Tighten fittings as necessary.
By following these steps, you can effectively install a well pressure tank that meets your needs and operates efficiently. Attention to detail helps ensure long-term success.
Frequently Asked Questions
Setting up a well pump and pressure tank can come with a few questions. I’m here to clear up some common concerns that many people have when talking about installation and maintenance of these systems.
What’s the proper way to set up a pressure tank and well pump together?
To set up a pressure tank and well pump, start by placing the pressure tank close to the pump for better efficiency. Connect the pump’s discharge line to the pressure tank’s inlet. Make sure to follow your specific pump and tank instructions for all fittings and adjustments.
Is installing a check valve between the well pump and pressure tank a smart move?
Yes, a check valve is a smart addition. It stops water from flowing back into the well when the pump shuts off. This helps maintain system pressure, prevents damage to the pump, and can make your system run more efficiently.
Can you walk me through the cost breakdown for installing a pressure tank and well pump?
The cost can vary widely, but here’s a rough breakdown. A well pump typically costs between $500 and $2,500, while a pressure tank can range from $300 to $1,200. Factor in installation costs, which might be an extra $500 to $1,500, depending on your region and the complexity of the job.
What are the consequences of wiring a well pump incorrectly?
Wiring a well pump incorrectly can lead to severe issues. It can cause the pump to run inefficiently or even burn out. In worst-case scenarios, it may create electrical hazards that could result in shorts or fires, so it’s crucial to follow wiring diagrams carefully.
How do I properly plumb a well pressure tank?
To plumb a well pressure tank correctly, ensure all connections are secure and check for leaks. Start by connecting the tank’s inlet to the system supply line, and make sure to set the pre-charge to the right pressure. It’s also a good idea to install a shut-off valve for maintenance purposes.
Could you explain the integration of a 1 horsepower water pump with a pressure tank?
Integrating a 1 horsepower water pump with a pressure tank is straightforward. The pump should be connected to the tank as outlined in the setup instructions. Ensure the pressure switch is set correctly to activate the pump at the right pressures for seamless operation.

Thomas Peterson
Owner WSA
About the Author
Latest Posts
Born and raised in Nanaimo on Vancouver Island. Thomas gained a deep appreciation for the importance of clean, reliable water. With over 15 years of experience working with water treatment systems, Thomas has become a trusted expert in helping local homeowners and businesses resolve the unique challenges of well water across the Island.
From hard water and iron buildup to low water pressure and sediment issues, Thomas takes a practical, no-nonsense approach to solving water problems. Whether it’s installing filtration systems or troubleshooting well pump issues, Thomas focuses on long-lasting solutions that help people get the clean, safe water they need.
As a proud local professional, Thomas is dedicated to serving his community with honesty, quality service, and expert advice tailored to the water conditions of Vancouver Island.
Areas of Expertise: Well Service, Well Pumps, Water Filtration Systems
- Clack Water Softener Alternatives: Top Systems for Hard Water Treatment in 2025 November 8, 2025
- Best Well Water Test Kit Options for Safe Home Water Testing in 2025 November 5, 2025
- Best Well Water TDS Meter for Accurate Home Testing in 2025 November 1, 2025
- Best Well Water Sediment Filter Systems for Clean Home Water in 2025 October 29, 2025
- Best Well Water Saltless Water Softener Systems for 2025 October 26, 2025
Facebook Twitter LinkedIn Instagram Reddit
Fact Checked & Editorial Guidelines
Our Fact Checking Process
We prioritize accuracy and integrity in our content. Here’s how we maintain high standards:
- Expert Review: All articles are reviewed by subject matter experts.
- Source Validation: Information is backed by credible, up-to-date sources.
- Transparency: We clearly cite references and disclose potential conflicts.
Your trust is important. Learn more about our fact checking process and editorial policy.
Reviewed by: Subject Matter Experts
Our Review Board
Our content is carefully reviewed by experienced professionals to ensure accuracy and relevance.
- Qualified Experts: Each article is assessed by specialists with field-specific knowledge.
- Up-to-date Insights: We incorporate the latest research, trends, and standards.
- Commitment to Quality: Reviewers ensure clarity, correctness, and completeness.
Look for the expert-reviewed label to read content you can trust.