How to Prime a Deep Well Pump? Step-By-Step Guide
How to prime a deep well pump? Priming a deep well pump fills the system with water, allowing it to function effectively and preventing potential damage.
When it comes to ensuring a reliable water supply, knowing how to prime a deep well pump is essential. Priming a deep well pump fills the system with water, allowing it to function effectively and preventing potential damage. Without this vital step, your pump may run dry, leading to costly repairs and frustrating disruptions in water access.
I’ve seen firsthand how proper priming can keep a well pump running smoothly. With the right techniques and a bit of preparation, you can tackle this task with confidence. Whether you’re a seasoned homeowner or facing this for the first time, I’m here to help guide you through each step of the process.
Key Takeaways
- Priming is crucial for proper deep well pump operation.
- Following the right steps ensures a smooth priming process.
- Regular maintenance is key to prolonging the life of your well pump.
Understanding the Basics of Deep Well Pumps
Deep well pumps are essential for accessing ground water from greater depths. Knowing the types and key components of these systems is crucial for effective operation and maintenance.
Types of Well Pumps
There are a few main types of well pumps to consider. The two most common for deep wells are submersible well pumps and jet pumps.
Submersible well pumps are designed to work underwater. They push water to the surface from depths often greater than 25 feet. This design makes them efficient for deeper wells.
Jet pumps, on the other hand, need to be installed above the water level. They use suction to lift water from below. These are often used for shallower wells but can handle deeper applications with a convertible design.
Both types have specific advantages. Submersible pumps generally require less maintenance and are quieter, while jet pumps can be easier to access for repairs.
Components of a Deep Well Pump System
Understanding the components of a deep well pump system is key to ensuring its efficient operation.
At the heart of the system is the pump itself, which can be either submersible or non-submersible. Each has its own setup requirements.
Next is the drop pipe, which transports water from the pump to the surface. The motor powers the pump, and if you have a submersible model, it’s usually integrated into the pump itself.
A pressure tank is another important component. It stores pressurized water for home use and helps maintain consistent water flow.
Lastly, there’s the control box, which helps manage the pump’s operation. Knowing how these parts work together can help prevent issues and ensure long-lasting performance.
Preparing for the Priming Process
Before I get into priming the deep well pump, it’s crucial to understand a few key steps. Proper preparation makes a huge difference in how smoothly the process goes. I always make sure I’m equipped with the right tools and safety measures before I start.
Safety Precautions
Safety comes first. Always wear gloves and safety goggles to protect yourself from any splashes or debris. Before I begin, I make sure the power supply to the pump is off. This prevents any accidental starts while I’m working.
Next, I check for any leaks in the system. If I notice any, I fix them before I start priming. It’s also important to have a buddy nearby, just in case something goes wrong. When I’m working with a deep well pump, I keep my phone handy for emergencies. Lastly, if I’m using a water hose to prime, I ensure it’s in good condition without any cracks or kinks that could affect water pressure.
Tools and Materials Required
To prime the pump effectively, I gather a few essential tools and materials. I typically need a water hose that fits securely with no leaks. A prime plug is necessary for the priming process itself; it allows me to introduce water into the pump.
It’s also helpful to have a check valve and a foot valve on hand. The check valve prevents backflow, which can mess up my efforts, while the foot valve keeps water from draining back down the well. Having a bucket nearby helps collect any excess water during the process.
Lastly, I grab a wrench and screwdrivers. They help adjust fittings securely if needed. With the right tools and precautions in place, I’m set to efficiently prime my deep well pump.
Steps to Prime a Deep Well Pump
Priming a deep well pump is crucial for ensuring that water is drawn efficiently from the ground. I’ll walk you through the essential steps to get your pump ready for action, covering how to access the system, inspect key components, and fill the pump casing.
Accessing the Pump System
First, I need to get to the pump system. Depending on your setup, this might involve removing a protective cover or accessing the well head directly.
If you have a submersible pump, it’s typically located deep within the well. I recommend having a strong flashlight to check for any visible issues.
For jet pumps, which sit above ground, ensure you have plenty of space to move around. It’s important to keep the area clear of debris to make my work easier.
Once I have clear access, I can turn off the power supply to avoid any accidental starts while I work.
Inspecting the Pump and Valves
Next, I carefully inspect the pump and its valves. I look for cracks, leaks, or wear on the pump casing and pipes.
The release valves are particularly important. They should operate smoothly for the pump to function correctly. If any parts appear damaged, I note them down.
I also check the pressure vacuum control. This component regulates the air pressure needed to pull water efficiently. A malfunctioning valve can result in air getting trapped, preventing the pump from working properly.
It’s wise to replace any faulty parts before moving to the next stage. A little diligence here saves me headaches later on.
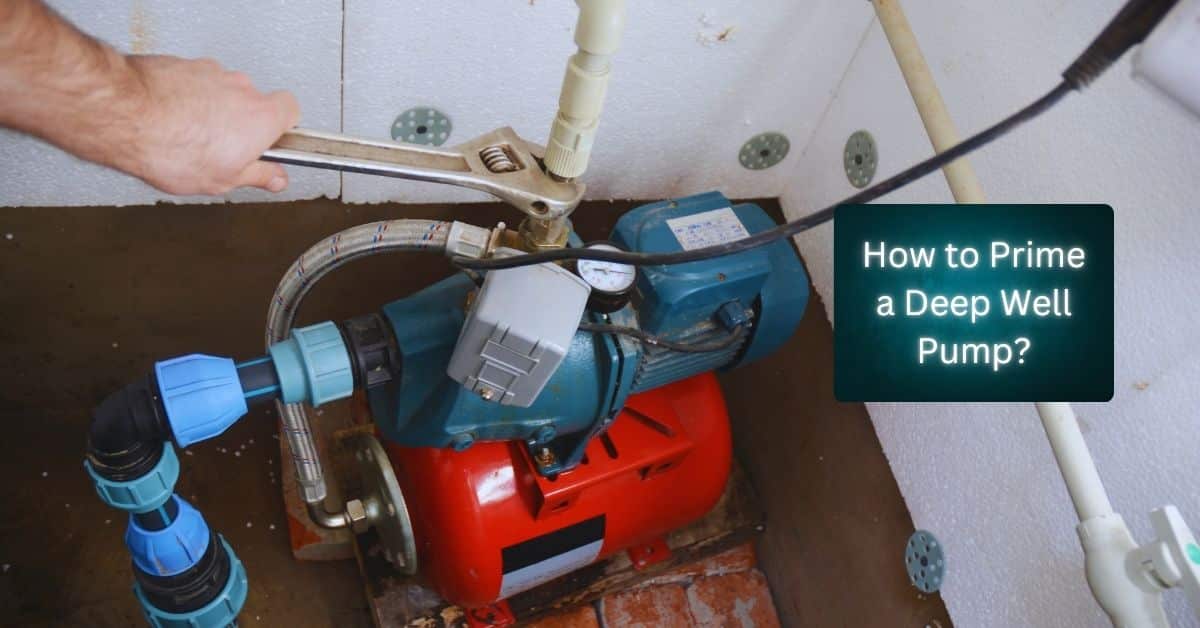
Filling the Pump Casing
Now it’s time to fill the pump casing with water. This step is essential for priming the pump so it can create the necessary suction to draw water from the well.
I open the priming plug on the casing, which is usually found on the pump body. Using a hose or bucket, I fill the casing until water spills from the overflow.
Once filled, I close the priming plug tightly to avoid air leaks. Finally, I check all connections to ensure everything is secure before turning the power back on.
After priming, I monitor the pump as it starts to operate, watching for any unusual sounds or issues. This careful process makes sure my deep well pump is ready to deliver the water I need.
Restarting and Troubleshooting
When it comes time to restart your deep well pump, it’s important to ensure everything is working correctly. This means carefully re-energizing your system and knowing how to handle any issues that might arise.
Re-energizing the Pump System
First, make sure your power supply is stable. Check the circuit breaker and reset it if necessary. Next, I inspect the check valve. This valve should be closed to keep water from flowing back into the well. After everything is good to go, turn on the power to the pump and listen for signs that it’s running.
If using a submersible pump, ensure it is properly submerged in water. Avoid running it dry, as this can cause damage. Once the pump powers on, keep an eye on your water pressure gauge. The pressure should rise to standard levels. If it doesn’t, you might have a priming issue.
Troubleshooting Common Issues
If your pump isn’t working, let’s troubleshoot. Start by checking the power supply and ensuring the pump is plugged in and operational. If it’s a priming well pump, follow the priming steps again. Make sure the lines are free of air.
Low water pressure might suggest a clogged pipe or a malfunctioning check valve. I would check for leaks or obstructions in the line that need attention. If the pump runs but doesn’t circulate clean water, it could mean the impeller is stuck or damaged.
Always take the time to assess and identify the problem before diving into repairs. A little patience goes a long way in ensuring your system stays operational and efficient.
Maintaining Your Primed Well Pump
Maintaining your primed well pump is crucial for ensuring a steady supply of water. Regular inspections and understanding how self-priming systems work will help you keep your system in top shape.
Regular Inspection and Maintenance
I always suggest checking your well pump regularly. Look for any signs of leaks in the water lines or around the well casing. A small leak can turn into a big problem if not addressed right away.
Next, make sure your pressure tank is in good condition. This tank helps maintain a steady water pressure in your home. If it’s losing pressure, it could mean your pump is working harder than it should.
I recommend draining and cleaning the tank once a year. Keep the area around the pump clear of debris to allow for airflow. A well-maintained pump will last longer and work efficiently.
Understanding Self-Priming Systems
Self-priming well pumps are designed to make my job easier. They can draw water without needing to be manually primed after the initial setup. This feature is a real time-saver and ensures you have access to well water consistently.
I pay close attention to the pump’s motor and seals. If they’re damaged, it can affect the self-priming ability. Regularly check that the seals are intact and replace them if necessary.
Having a backup water source in case of issues with the self-priming system is also wise. I know from experience that being prepared saves a lot of hassle. Understanding how your self-priming pump operates will help maintain its efficiency and reliability over time.
Frequently Asked Questions
When it comes to priming a deep well pump, there are some common questions I get from homeowners. I’ve put together answers to help you tackle this process with confidence and clarity.
What’s the best method for priming a new deep well pump?
To prime a new deep well pump, I fill the pump with fresh water before starting it. I open the priming valve, add water until it overflows, then close the valve. Finally, I turn on the pump and watch for water flow. This helps avoid air pockets that can cause problems.
How do I go about priming a well pump that’s tied into a pressure tank?
With a pressure tank, I first ensure the tank is empty. Then, I open the drain valve to remove any air. Afterward, I follow the same steps to add water into the well pump. This ensures proper pressure and helps the system work effectively.
What steps should I take to prime a well pump after the electricity goes out, eh?
After a power outage, I check if any air has entered the system. I open the faucet connected to the well and let it run until all air is released. Then, I follow the regular priming procedure to fill the pump with water and restore full functionality.
Can you walk me through getting rid of air in my well pump line?
To remove air from my well pump line, I start by turning off the pump. I then open a faucet at the highest point in my plumbing to let the air escape. Once the water starts flowing steadily, I close the faucet and turn the pump back on.
What’s the main reason a well pump would fail to prime, and how can I troubleshoot it?
If my well pump fails to prime, it’s often due to air leaks or low water levels. I check for any cracks or loose fittings in the suction line. I also make sure the water level is high enough to reach the pump.
Why might I need to prime a deep well pump, and when should I do it?
Priming is necessary to remove air from the system and ensure proper water flow. I need to prime the pump when it’s newly installed or after maintenance that could introduce air. Regular checks help me keep my water supply steady.

Thomas Peterson
Owner WSA
About the Author
Latest Posts
Born and raised in Nanaimo on Vancouver Island. Thomas gained a deep appreciation for the importance of clean, reliable water. With over 15 years of experience working with water treatment systems, Thomas has become a trusted expert in helping local homeowners and businesses resolve the unique challenges of well water across the Island.
From hard water and iron buildup to low water pressure and sediment issues, Thomas takes a practical, no-nonsense approach to solving water problems. Whether it’s installing filtration systems or troubleshooting well pump issues, Thomas focuses on long-lasting solutions that help people get the clean, safe water they need.
As a proud local professional, Thomas is dedicated to serving his community with honesty, quality service, and expert advice tailored to the water conditions of Vancouver Island.
Areas of Expertise: Well Service, Well Pumps, Water Filtration Systems
- Clack Water Softener Alternatives: Top Systems for Hard Water Treatment in 2025 November 8, 2025
- Best Well Water Test Kit Options for Safe Home Water Testing in 2025 November 5, 2025
- Best Well Water TDS Meter for Accurate Home Testing in 2025 November 1, 2025
- Best Well Water Sediment Filter Systems for Clean Home Water in 2025 October 29, 2025
- Best Well Water Saltless Water Softener Systems for 2025 October 26, 2025
Facebook Twitter LinkedIn Instagram Reddit
Fact Checked & Editorial Guidelines
Our Fact Checking Process
We prioritize accuracy and integrity in our content. Here’s how we maintain high standards:
- Expert Review: All articles are reviewed by subject matter experts.
- Source Validation: Information is backed by credible, up-to-date sources.
- Transparency: We clearly cite references and disclose potential conflicts.
Your trust is important. Learn more about our fact checking process and editorial policy.
Reviewed by: Subject Matter Experts
Our Review Board
Our content is carefully reviewed by experienced professionals to ensure accuracy and relevance.
- Qualified Experts: Each article is assessed by specialists with field-specific knowledge.
- Up-to-date Insights: We incorporate the latest research, trends, and standards.
- Commitment to Quality: Reviewers ensure clarity, correctness, and completeness.
Look for the expert-reviewed label to read content you can trust.