How to Test Your Well Pump
I recently responded to a call from a customer in Parksville experiencing issues with their water well. They reported air in their water supply, which
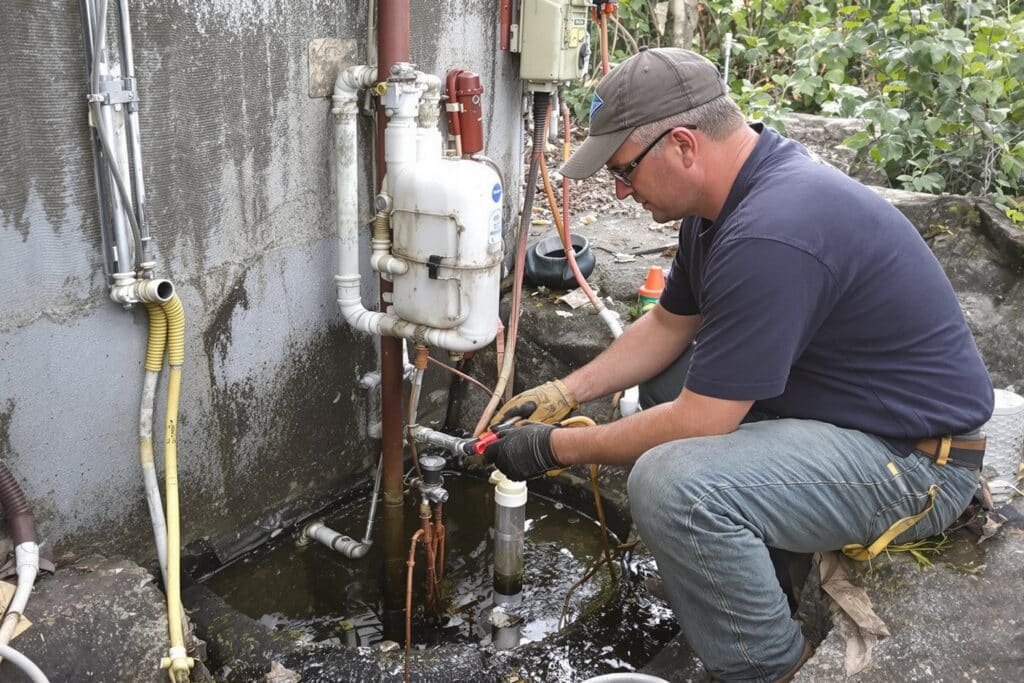
I recently responded to a call from a customer in Parksville experiencing issues with their water well. They reported air in their water supply, which eventually led to a complete loss of water. Upon arrival, I began my investigation to uncover the root cause of the problem.
My initial assessment revealed several potential issues. The pressure gauge on the tank showed a reading, but I couldn’t be certain of its accuracy. The air pressure in the tank seemed low, and I noticed a galvanized nipple that could be causing blockage. I also spotted a check valve that might be contributing to the air problem.
Key Takeaways
- Water system issues can stem from multiple sources, requiring careful inspection
- Electrical problems, like loose wires, can cause system malfunctions and safety hazards
- Regular maintenance and proper component selection are crucial for well system performance
Finding the Root Causes
Looking at the System and Pressure Gauge
I checked out the pressure gauge on the system. It showed some pressure, but I couldn’t be sure if it was working right. The tank still had some air, but not enough. I spotted a check valve near the tank. I’m not a fan of check valves in this spot. The contacts looked burnt, which was concerning.
Checking the Check Valve and Pipe Materials
I noticed a galvanized nipple instead of brass. This could be clogged up. The customer might be getting air because while this check valve works, the one in the pump might be leaking. Without pressure pushing back on it, the pump’s check valve can’t seal properly. This lets water in the drop pipe fall to the water level, creating an air pocket.
Air in the System and Possible Faulty Check Valve
The air problem might be from the check valve at the tank doing all the work. The one in the pump might not be holding. I planned to check the air pressure in the tank too. It looked about 15-20 years old. The date code said “4 9” or “9 96”, so maybe May 9, 1996. I thought the tank might be low on air. We needed to look at the well next to figure out what was going on.
Fixing Electrical Issues

Checking the Power Source
I started by looking at the power supply. The gauge showed pressure, but I couldn’t be sure if it was working right. I used my electric meter to check the voltage. At first, I got a weird reading of only 3 volts. After the customer turned on the breaker, I got normal readings of 240-242 volts at different points.
Reading Voltage Levels
With the power on, I checked the voltage again. I saw 242 volts in two spots and 240 volts in two others. This told me power was going through the switch and should be reaching the pump. But the contacts looked burnt on one side, which was a red flag.
Finding a Loose Wire
As I kept checking, I saw sparks and heard the system start running. Looking closer at the switch, I spotted a loose wire. It was arcing, which is really bad. I held the wire in place while the system pumped up and turned off. The smell of electricity was strong.
When I tried to fix the wire, I found it had melted the plastic around the contacts. The screw felt crusty, and the contacts on one side were all chewed up. This switch had likely been shorting for a while.
I’ll need to replace the switch and the galvanized nipple below it. I’ll also check the pump’s check valve and the tank’s air pressure. The tank looks about 15-20 years old based on its date code.
Fixing Electrical Problems

Spotting Sparks and Wire Damage
I noticed some serious issues with the wiring at the pressure switch. As I checked the connections, I saw sparks and heard a loud pop. This is very dangerous. The wire on one side was loose and kept arcing. I could smell burning electricity, which is never a good sign. When I looked closer, I saw the wire had actually started to melt the plastic casing around the contacts.
Steps to Shut Off Power
As soon as I spotted the melting wire, I told the customer to cut the power right away. It’s crucial to stop electricity flowing before working on any electrical components. The burning smell and visible damage meant we needed to act fast to prevent further issues or safety hazards.
Checking Screws and Contact Points
After the power was off, I took a closer look at the pressure switch. The screw holding the damaged wire felt rough and crusty. This poor connection likely caused overheating. I noticed the contacts on one side looked burnt and chewed up, while the other side still looked shiny and copper-coloured. This switch has probably had issues for a while now. A loose wire connection can create resistance, generate heat, and eventually melt components.
- Left side contacts: Burnt and damaged
- Right side contacts: Still in good condition
- Loose screw: Felt crusty when tightened
To fix this, I’ll need to replace the whole pressure switch. I’ll also swap out the galvanized nipple below it for a brass one. While I’m at it, I’ll check the air pressure in the tank since it looks quite old.
Checking Mechanical Parts

Looking at the Switch and Metal Pipe
I found a loose wire in the pressure switch. It sparked when I touched it, which is not good. The switch contacts were burnt on one side. This was likely causing power issues.
I tightened the loose wire, but it had melted the plastic casing. The switch needs to be replaced. I also spotted a galvanized pipe below the switch that should be swapped out.
Tank Age and Air Pressure
The pressure tank looks about 15-20 years old based on the date code. It’s from May 1996. The tank likely has low air pressure. I’ll check this after replacing the switch.
I measured the pump’s power draw at 8.3 amps. This is a bit high but might be okay for a 1 horsepower pump.
When I tested the well pipe, I got some water spray. This means the pipe isn’t broken underground. The pump could just be old and worn out.
Inspecting the Well
Taking Off the Cover and Cleaning Up
I took off the well cover and cleared away spider webs and Yellow Jackets. There was concrete poured in the bottom, which was odd. I noticed they used galvanized fittings here and at the tank, which could be an issue.
Looking at Fittings and Possible Lightning Strike
I checked the amp draw, which was 8.3 – a bit high but not unusual for a one-horsepower pump. The owner mentioned an electrical storm recently, so lightning might have struck the well. They also live on a major fault line with earth tremors.
I tested the water pressure. There was some spray, but it behaved strangely. The check valve seemed to be working, which was unexpected. I could get water out by hand-pumping, showing the pipe isn’t leaking underground.
Talking About a New Well Project
The owner brought up drilling a new well. They have another one on the property already. The current well has what looks like gold flakes and black sand in it. We discussed the possibility of connecting a different well to the house or maybe drilling a completely new one.
Checking Pump and Water Pressure

Looking at Power Use and Pressure Ideas
I checked the power at the switch and saw 242 volts on all connections. This meant power was going to the pump. The switch contacts looked burnt on one side. I noticed a loose wire that sparked when I touched it. This loose connection likely caused the switch to overheat and melt.
The amp draw was 8.3 amps when we turned it on. This is a bit high, but might be okay for a 1 horsepower pump. We let it run to see if it would pump up and shut off on its own.
Examining Well Pressure and Valve Function
At the well, I tested the pressure. In theory, there should be 40 PSI of water pressure pushing back.
I thought I might find a broken pipe or fitting in the well. But when I opened the valve, I got some spray.
This was odd, as I expected no pressure if there was a leak.
I pumped the valve by hand and got water out easily. This means the pipe and pump are working fine underground.
If there was a leak, I wouldn’t be able to pump water up like that.
The check valve at the tank may be causing issues. When it holds back all the pressure, the pump’s check valve doesn’t seal properly.
This can let air into the pipes. That’s why many plumbers don’t like using check valves at tanks.

Thomas Peterson
Owner WSA
About the Author
Latest Posts
Born and raised in Nanaimo on Vancouver Island. Thomas gained a deep appreciation for the importance of clean, reliable water. With over 15 years of experience working with water treatment systems, Thomas has become a trusted expert in helping local homeowners and businesses resolve the unique challenges of well water across the Island.
From hard water and iron buildup to low water pressure and sediment issues, Thomas takes a practical, no-nonsense approach to solving water problems. Whether it’s installing filtration systems or troubleshooting well pump issues, Thomas focuses on long-lasting solutions that help people get the clean, safe water they need.
As a proud local professional, Thomas is dedicated to serving his community with honesty, quality service, and expert advice tailored to the water conditions of Vancouver Island.
Areas of Expertise: Well Service, Well Pumps, Water Filtration Systems
- Clack Water Softener Alternatives: Top Systems for Hard Water Treatment in 2025 November 8, 2025
- Best Well Water Test Kit Options for Safe Home Water Testing in 2025 November 5, 2025
- Best Well Water TDS Meter for Accurate Home Testing in 2025 November 1, 2025
- Best Well Water Sediment Filter Systems for Clean Home Water in 2025 October 29, 2025
- Best Well Water Saltless Water Softener Systems for 2025 October 26, 2025
Facebook Twitter LinkedIn Instagram Reddit
Fact Checked & Editorial Guidelines
Our Fact Checking Process
We prioritize accuracy and integrity in our content. Here’s how we maintain high standards:
- Expert Review: All articles are reviewed by subject matter experts.
- Source Validation: Information is backed by credible, up-to-date sources.
- Transparency: We clearly cite references and disclose potential conflicts.
Your trust is important. Learn more about our fact checking process and editorial policy.
Reviewed by: Subject Matter Experts
Our Review Board
Our content is carefully reviewed by experienced professionals to ensure accuracy and relevance.
- Qualified Experts: Each article is assessed by specialists with field-specific knowledge.
- Up-to-date Insights: We incorporate the latest research, trends, and standards.
- Commitment to Quality: Reviewers ensure clarity, correctness, and completeness.
Look for the expert-reviewed label to read content you can trust.